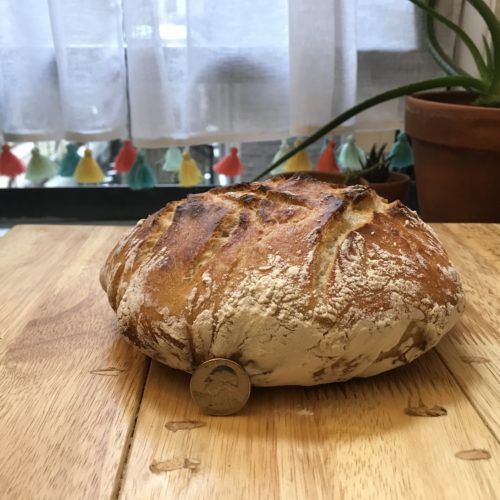
DAVE ADAM'S NO-KNEAD SOURDOUGH BREAD - Nic Adams, deck carpenter
"'What the Sourdough Bread Means to Me.' When I was fifteen years old, my dad began tinkering with this recipe. I remember during those early bread-baking years watching him check his watch whenever we were out of the house, or having to sneak in late to church because he had to feed his starter. But seeing my dad grapple with this challenge was very instructive, too. It’s important to see people work through something, especially those we think of as infallible, in order to learn how to gain confidence and build skills. Around the time I left for college he had it down cold, and coming home always meant, in addition to ceaseless fits of laughter, and slowing to the crawl of Southern California life, departing with a loaf of bubbly, sour, fresh baked bread."
Ingredients
- 3 cups All-purpose, unbleached white flour (you can add different types of flour, but it’ll change the amount of water you’ll need)
- 1.5 tsp Salt
- 1/4 cup Sourdough starter
- 1.5 cups Filtered water (room temp to tepid)
Instructions
NON-BAKE WEEK SOURDOUGH STARTER INSTRUCTIONS:
- Take your starter out of the fridge. Let it rise to room temp (~3 hours).
- Feed the starter with filtered water (room temp) and all-purpose, unbleached white flour. Ratio is 1:1:1 (starter/water/flour).
- Mix gently until the flour is incorporated.
- Let it do its thing on the counter for ~3 hours. Place it in a bowl and crack the lid to prevent explosions/leaks.
- Refrigerate at least a ½ cup for the next bake plus a little extra, and give the rest to a friend, flame, or neighbor so they can bake too.
- Repeat weekly.
BAKE WEEK SOURDOUGH STARTER INSTRUCTIONS:
- 24 – 48 hours before baking, take your starter out of the fridge. Let it rise to room temp.
- Feed the starter with filtered water (room temp) and all-purpose, unbleached white flour. Ratio is 1:1:1 (starter/water/flour).
- Mix gently until the flour is incorporated.
- Let it do its thing on the counter for ~3 hours. Place it in a bowl and crack the lid to prevent explosions/leaks.
- Keep ¼ cup for the recipe below, refrigerate at least a ¼ cup for the next bake, and give the rest to a friend, flame, or neighbor so they can bake too.
~12 hours before you want to bake:
- Wash your hands.
- Combine flour and salt in a mixing bowl. Mix.
- Combine sourdough starter and water in a different container. Mix gently until fully incorporated (it’s a living thing).
- Combine wet and dry ingredients. Mix well for 3 – 4 minutes. You want a sticky, wet, shaggy mass. Not runny.
- Note that the next step, the first rise (or bulk fermentation) should result in twice the volume of dough, so if your mixing bowl isn’t big enough to hold twice the amount, transfer now.
- Cover with proofing bag, seal with a rubber band, set in a stable temperature environment (tip: place inside oven with oven light on), and let it do its thing until doubled (12 – 15 hours).
~90 minutes before you want to bake:
- Wash your hands.
- Liberally flour the interior of the chosen container for the second rise.
- Sprinkle flour over your work surface, pour/scrape dough onto work surface. Sprinkle flour on the top of your dough, and onto your hands.
- Pat dough lightly to de-gas it.
- Shape dough into a round loaf (tip: the plastic scraper helps here). As bubbles form on the exterior, pinch them to release gas. You want holes in the loaf, but mostly of a uniform size and on the interior.
- Transfer the dough to the container for the second rise. Cover with proofing bag, seal, set aside for 90 minutes.
- You’ll need to preheat your oven to 475 degrees Fahrenheit, so depending on how long your oven takes to reach that temperature (mine takes 15 minutes) you may want to preheat now. If you choose to bake your sourdough loaf in an oven-safe pot, insert it into the oven to let it rise in temp when you pre-heat.
- Tip: I bake the bread in a pot in order to control and contain à la a baking bell, and to give the loaf a rigid, uniform shape. It’s not necessary, but I find makes it more manageable.
Bake Time:
- Wash your hands.
- Remove the container for the second rise from the proofing bag. Place parchment paper on top of container. Place sheet pan on top of parchment paper. Invert tray, parchment paper and proofing container upside down to encourage dough to fall from container onto parchment paper.
- Score the exterior of the dough with a sharp knife or blade. You can do any pattern you want, but a single line or an X is sufficient. This controls the rise of the dough when baking.
- Optional: if using oven-safe pot: put on oven mitts, open oven and place the pot-that-is-hot on stove burner grate or cooling rack. Remove lid. Lift the parchment paper on which the dough sits, place dough and parchment paper inside pot. Restore lid to pot and cut off excess parchment paper with scissors.
- Tip: to keep the crust of the bread from becoming too hard, mist it with water using a spray bottle right before baking.
- Put the dough in the oven and bake for 30 minutes.
- Remove lid from pot and vent oven for the final 5 minutes of the bake.
- If you have a food/meat thermometer, insert it into the loaf. When the internal temperature is between 200 – 205 degrees Fahrenheit your bread is baked.
- Remove pot from the oven, remove loaf from pot, set on cooling rack.
- Wait until cool. Wash your hands. Enjoy!